
I had been wanting to test a few data recovery tools on a formatted drive. Several of the apps had received updates, and I was curious to see how they would perform in a tough recovery scenario rather than another deleted-file test. (Formatting is a better challenge.)
I also had an old hard drive sitting around that I needed to format anyway, so the timing worked out. High time for a little tinkering. I did not want to turn this into an overly technical lab test. The setup here was simple: load the drive with files, format it, run each recovery tool, and see how well each one could recover a formatted hard drive and bring the files back (in working condition).
This is what I found.
What You Should Know About Formatting
As I said, formatting is a bigger challenge for recovery tools because it is far far more destructive than ordinary deletion.
- When you delete something from a drive, the file system removes its entry and marks that space as ‘available’. So the actual file data may remain in place until new data writes over it. In many cases, the original file name and other metadata can also survive for recovery software to use.
- Formatting affects the entire volume. It creates a new file system and replaces much of the information that previously described where files were stored and how they were organized. The drive appears empty afterward, and recovery software may need to identify files from their raw data rather than rely on intact file system records.
That is why, under ideal conditions, even a basic recovery tool can handle simple file deletion. Formatting forces the software to work with a ‘rebuilt’ file system, and that is where the differences between recovery tools become much easier to see. So I figured I would make my job easier and choose a test that gives the software fewer places to hide.
How I Ran the Formatted Hard Drive Recovery Test
Now let’s talk methodology.
The Test Drive and Format Scenario
I ran the test on my Windows 11 PRO PC with an AMD Ryzen 5 5600 processor and 16 GB of RAM.
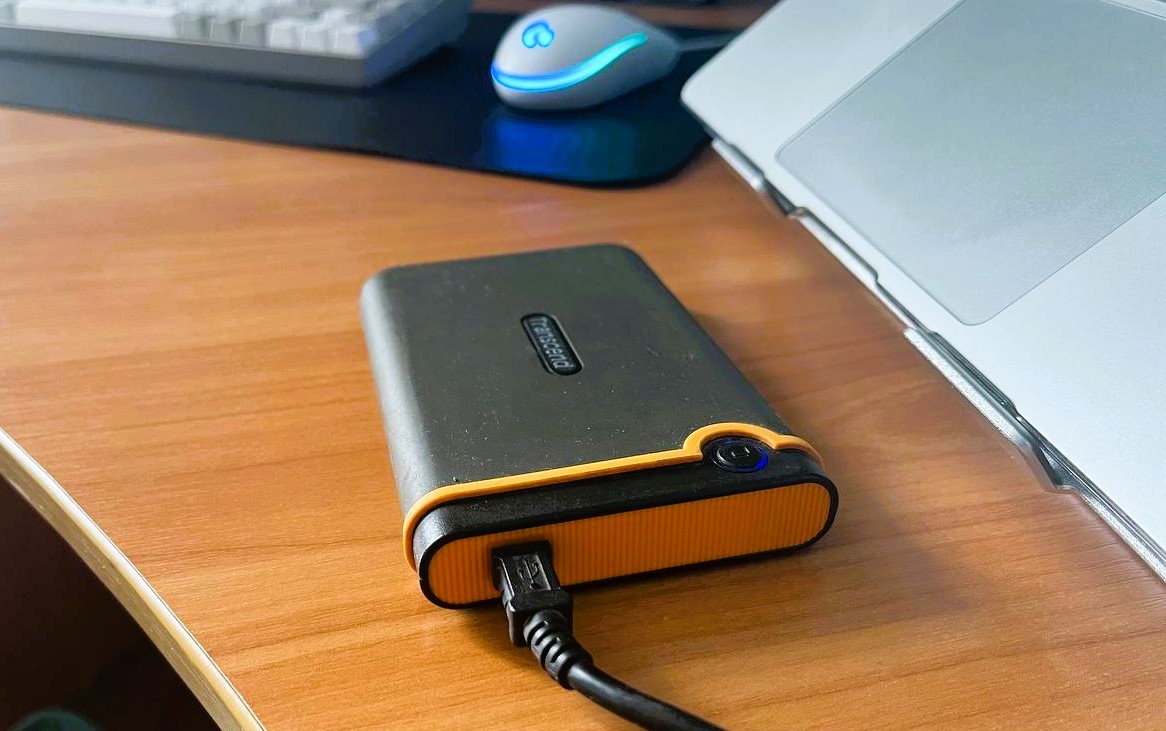
The drive itself was an old, trusty 500 GB Transcend StoreJet external hard drive connected over USB. Before the test, the drive was formatted as NTFS. It had been sitting around collecting dust for a while, and I had already planned to format it and reuse it for photo backups. Convenient test subject.
Before starting the test, I copied the test files to another drive and performed a full format on the Transcend HDD to clear out data left from its previous use. I then copied the 144-file test set back onto the freshly formatted drive. Only after that did I perform the quick format described below, so any files found during recovery could be compared against a known test set.
Formatting the drive is straightforward. I found it in File Explorer, right-clicked it, and selected Format. (Disk Management works too when a drive does not appear normally in File Explorer.)
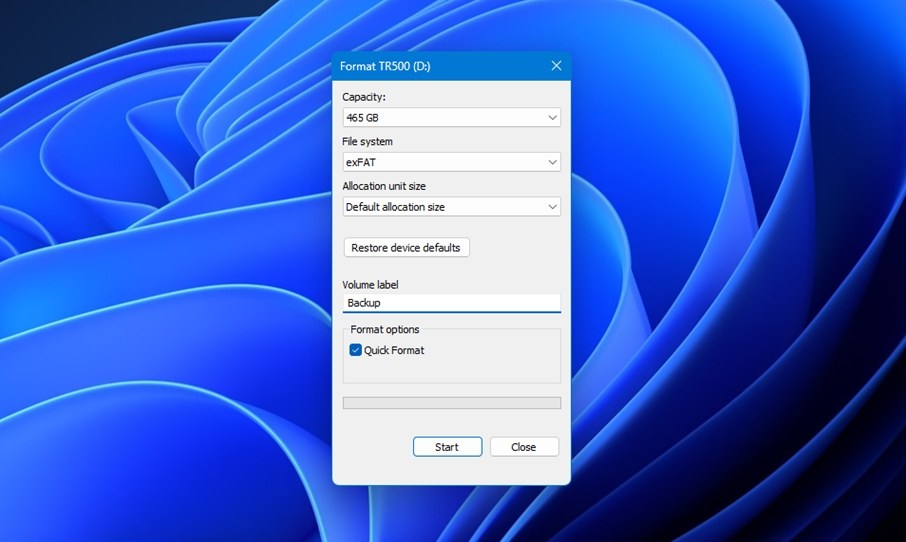
From there, I chose exFAT, gave the drive a new name, and left everything else at its default value. Kept Quick Format checked, clicked Start, and waited for Windows to finish.
That ‘Quick Format’ checkbox matters here:
- A quick format creates a new file system, yes. But it does not intentionally write over everything. Much of the original data may still be there (if its traditional HDD, which it is; with SSDs things are trickier thanks to TRIM).
- A full format goes much further and checks the entire volume and writes across it, which will overwrite the old data recovery software would otherwise try to find. Had I unchecked Quick Format, there would have been nothing really left to test.
So, quick format was the obvious choice here. It is also the option most people use anyway.
The Files on the Drive
Before formatting the drive, I wanted a proper baseline. Otherwise, a recovery app saying it found 200 files would not tell me much. I needed to know exactly what was there first.
I scanned the drive with WizTree and took the full breakdown. The test set contained 144 files, totaling about 832 MB.
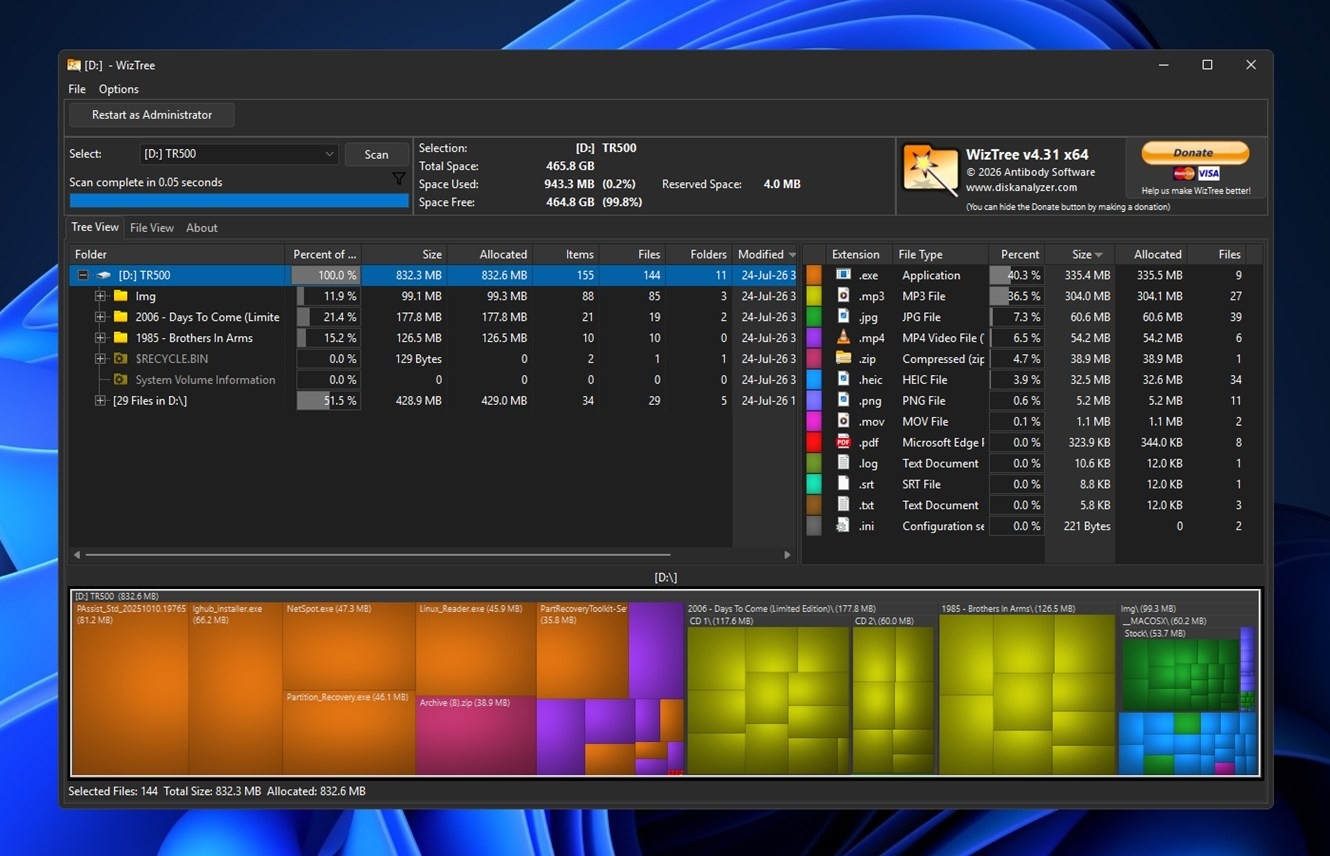
Here is what was on the drive:
| File type | Format | Files | Total size |
|---|---|---|---|
| Audio | MP3 | 27 | 304.0 MB |
| Photos | JPG | 39 | 60.6 MB |
| Videos | MP4 | 6 | 54.2 MB |
| Archives | ZIP | 1 | 38.9 MB |
| Photos | HEIC | 34 | 32.6 MB |
| Images | PNG | 11 | 5.2 MB |
| Videos | MOV | 2 | 1.1 MB |
| Documents | PDF, RTF | 8 | 323.9 KB |
| Other | ZIP, MSI, XML, EXE | 16 | 335.5 MB |
| Total | 144 | 832.3 MB |
A pretty diverse mix, with most of the space taken up by audio files and photos, but there were also some PDF documents, videos, text files, archives, and a few application files. That gave the recovery tools a broad enough mix to show where each one performed well and where it started to struggle.
The Apps I Tested and How I Measured Recovery Success
For the test, I picked four recovery tools. They are all well-known, and several had received recent updates, so I wanted to see how the latest versions handled things. I also included one that’s pretty “special” to me (for obvious reasons, duh).
I also wanted a mix of mainstream user-friendly apps and tools that lean more technical, because that usually makes the comparison more interesting for me.
The apps I tested were:
- Disk Drill (v6.3.1398.0)
- UFS Explorer (v10.21.1)
- MiniTool Power Data Recovery (v13.0)
- PhotoRec (v7.2)
As for the test, I did not want to judge these tools by one number alone. A recovery app can find a large number of files and still do a mediocre job if many of those files come back corrupted. So I tracked a few things for each tool.
- First, I looked at how many files it found on the formatted drive.
- After that, I opened the recovered files and checked how many were still usable. A photo that opens properly counts. A video that refuses to play does not. Fair enough, I think.
- I looked at scan speed.
- And I also noted the things that cannot be reduced to a number, such as how easy each tool was to use, how clearly it organized the results, whether previews worked, and how much effort it took in general.
How to Recover Data From a Formatted Hard Drive
I wanted this guide to be useful beyond the comparison itself, especially for someone doing this for the first time. So before getting into my test results, here is what formatted hard drive recovery actually looks like in practice.
There is little value in showing the same basic process four times. Most recovery tools follow a similar pattern: select the drive, scan it, review what was found, and save the recovered files. I used Disk Drill for this walkthrough because its workflow is easiest to follow and it gives a clear view of the files during the scan. It is also the most capable of the four, but we’ll get back to that later.
After formatting, I did not use the drive for anything except scanning. Every new write can overwrite data that recovery software might still be able to restore. So if you are dealing with an accidentally formatted drive, stop using it until you finish the recovery.
Here is how you can recover files from a formatted hard drive:
- Download and install Disk Drill on a different drive from the one you formatted.
- Open the app and select the formatted hard drive from the device list. In my case, it appeared under its new volume name.
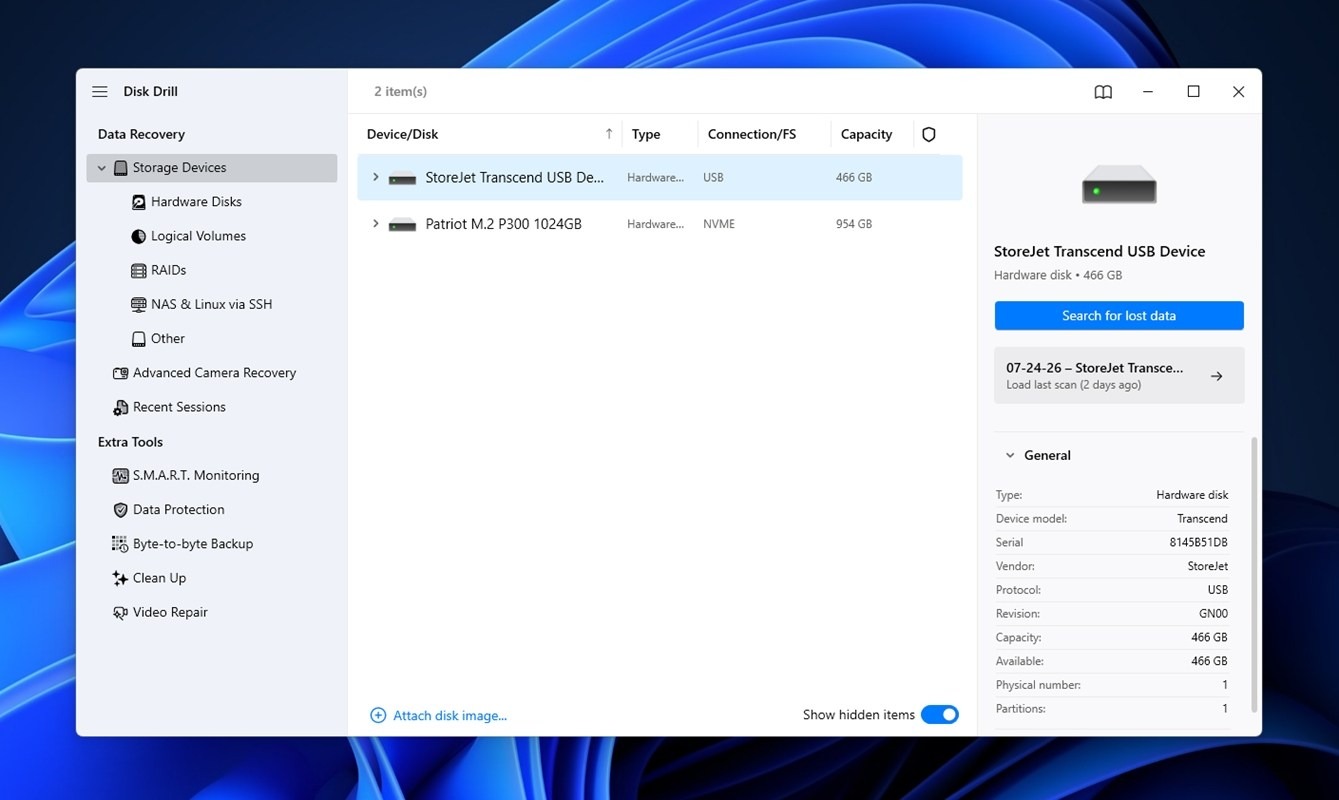
- Click Search for lost data. Then, if it asks, select Universal Scan; it is the right option for this kind of case. Disk Drill then scans the formatted drive for recoverable file records and known file signatures.
- The scan starts building results almost immediately. At 1% complete, the app had already found most files and sorted them into Pictures, Videos, Audio, Documents, and Archives. I could already see files while the scan was still running, which was useful for grabbing screenshots. Right from the start it had already picked up 109 files. (For the actual test results, though, I always waited for each scan to finish completely before counting what the tool had recovered.)
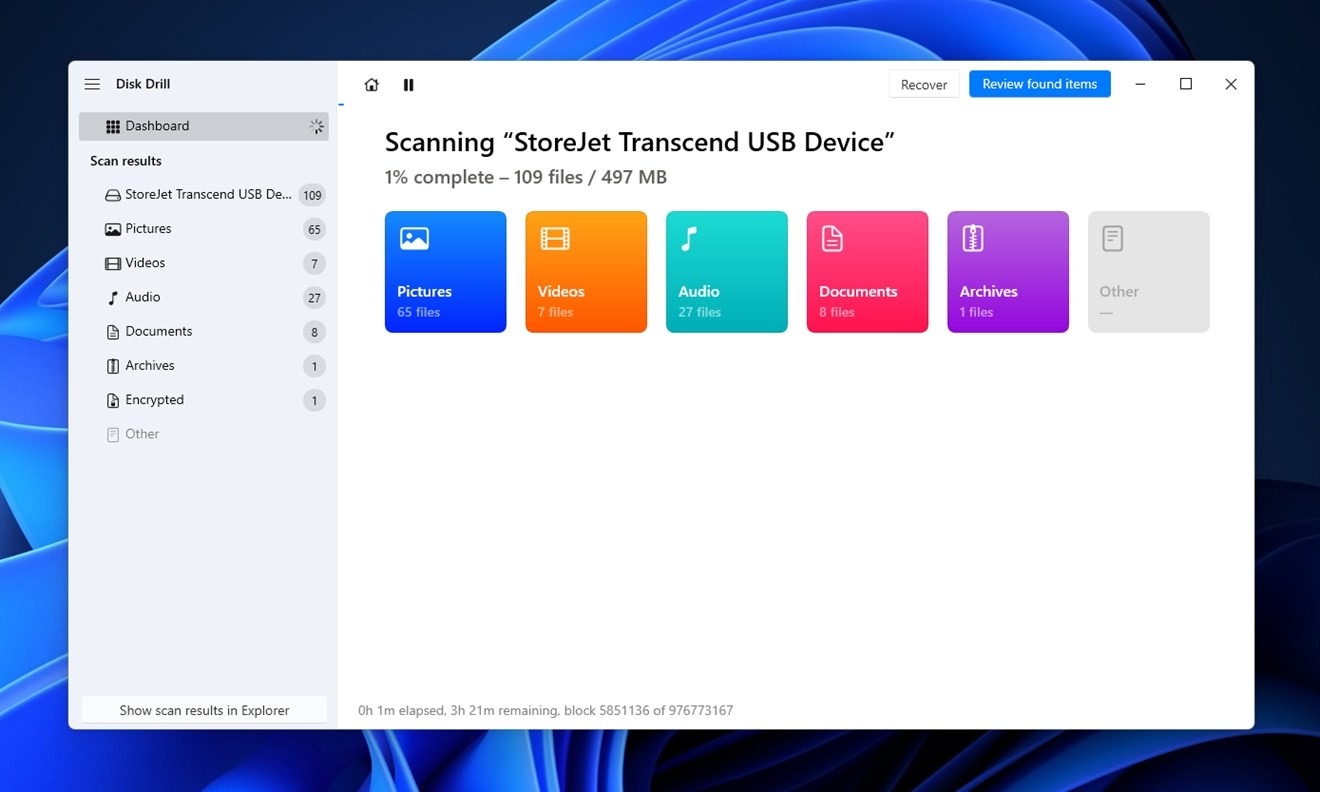
- The scan continued in the background while I reviewed the files. I could filter the results and search by name or extension. The preview pane was especially helpful because formatting often wipes out file names. Disk Drill still showed previews for the recovered iPhone photos, for example, so I did not have to open a long list of files one by one and guess what each one contained.
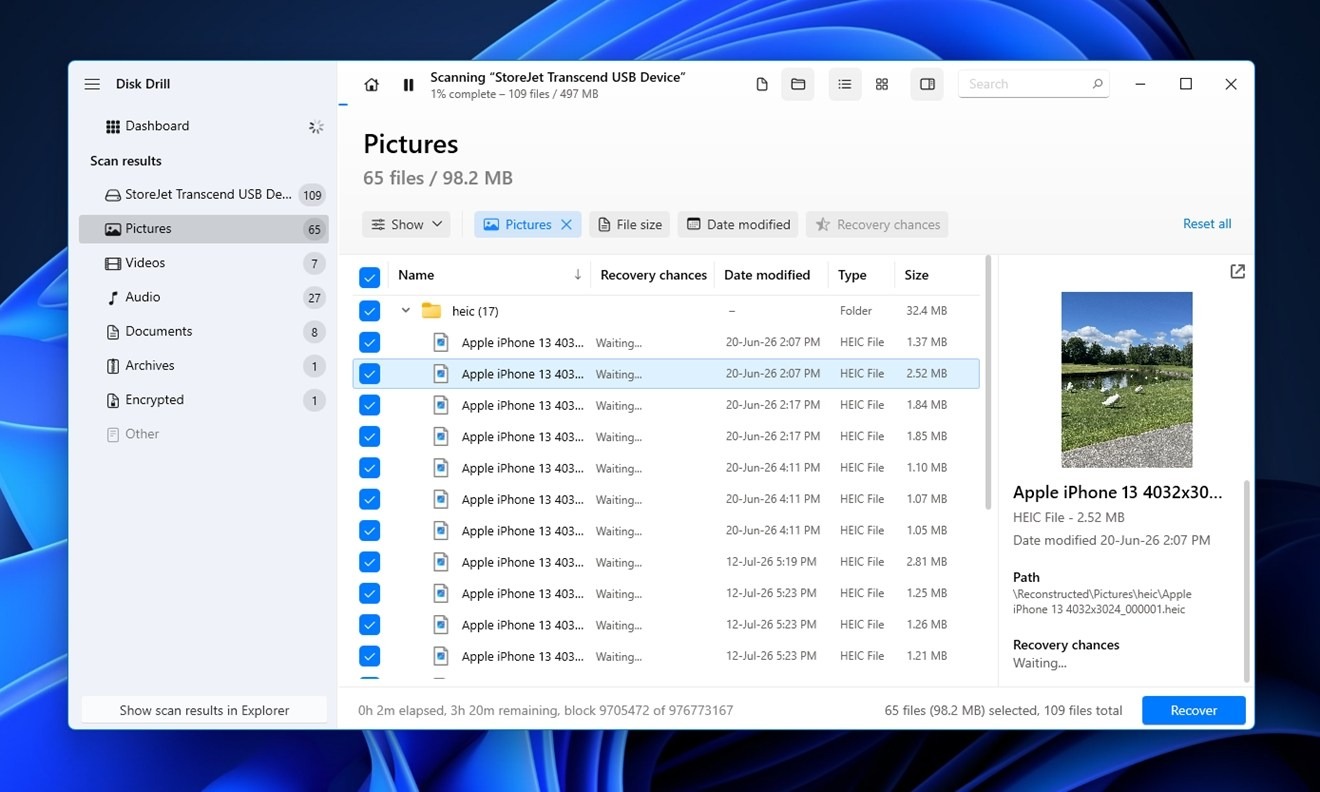
- Once I had selected all the files, I clicked Recover and saved them to my computer’s internal drive, not back to the formatted HDD.
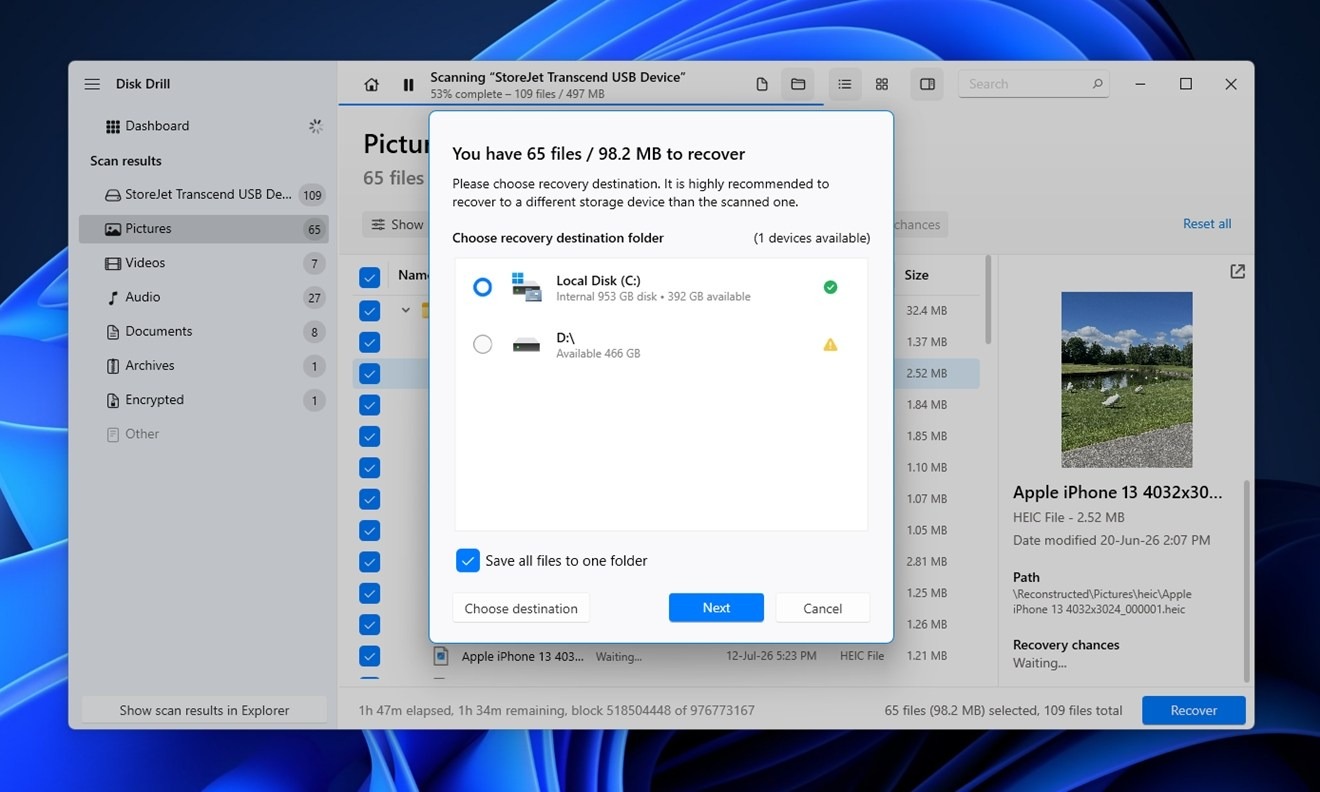
- After the process finished, I opened files from each category to check that they were actually usable.
The process is pretty simple and requires very little input. That is why I chose Disk Drill for this. It is the easiest app to demonstrate, and in terms of usability, the other tools I tested could not quite keep up. But more on that later.
Which Tool Recovered the Most From the Formatted Drive?
Now for the main course: the numbers.
| Tool | Files found | Original files recovered | Working files | Working recovery rate | Scan time |
| Disk Drill | 226 | 143 / 144 | 143 / 144 | 99% | ~3h 40m |
| PhotoRec | 140 | 140 / 144 | 140 / 144 | 97% | ~4h 20m |
| MiniTool | 117 | 117 / 144 | 116 / 144 | 80% | ~4h 40m |
| UFS Explorer | 138 | 138 / 144 | 138 / 144 | 96% | ~5h+ |
Disk Drill produced the biggest number by far, but 226 files does not mean I originally placed 226 files on the drive. There were only 144 files in my test set. Disk Drill found 143 of those (missed just one EXE file) and also picked up other files – system files that normally do not appear in File Explorer. I did not count those, of course. Once I disabled the option to show hidden and system files, the result count dropped to exactly the number of test files it recovered. More importantly, all found files came back in working condition without corruption. The full scan took under 4 hours. About as good a result as you can hope for.
PhotoRec finished with 140 files after around 4 hours 20 minutes. It recovered the major stuff and most of the media. The missing files appeared to be some of the tiny text/config files. It also handled media a little differently from the original layout. HEIC, MP4, and MOV content ended up classified differently, and 1 fewer file appeared under JPG. Still, 140 out of 144 was a strong result.
MiniTool took around 4 hours 40 minutes and finished with 117 files, noticeably behind the others. It missed several groups from the original set, including EXE and some of the smaller MSI, XML files. There was also one more important problem: one recovered video was damaged. I tried a couple of video repair tools I’d successfully used in the past (Untrunc, VLC), just to see if it could be salvaged, but no luck. The file was beyond repair. Either way, I wouldn’t count this unusable file as successfully recovered.
UFS Explorer took the longest of the four and finished with 138 files, six short of the original 144. Its scan was also harder to follow because I could not browse useful live results the way I could with Disk Drill or MiniTool. I basically had to wait for the scan to finish before I could see what it had found. The good part is that the 138 files it did recover were all usable, with no corruption in the files.
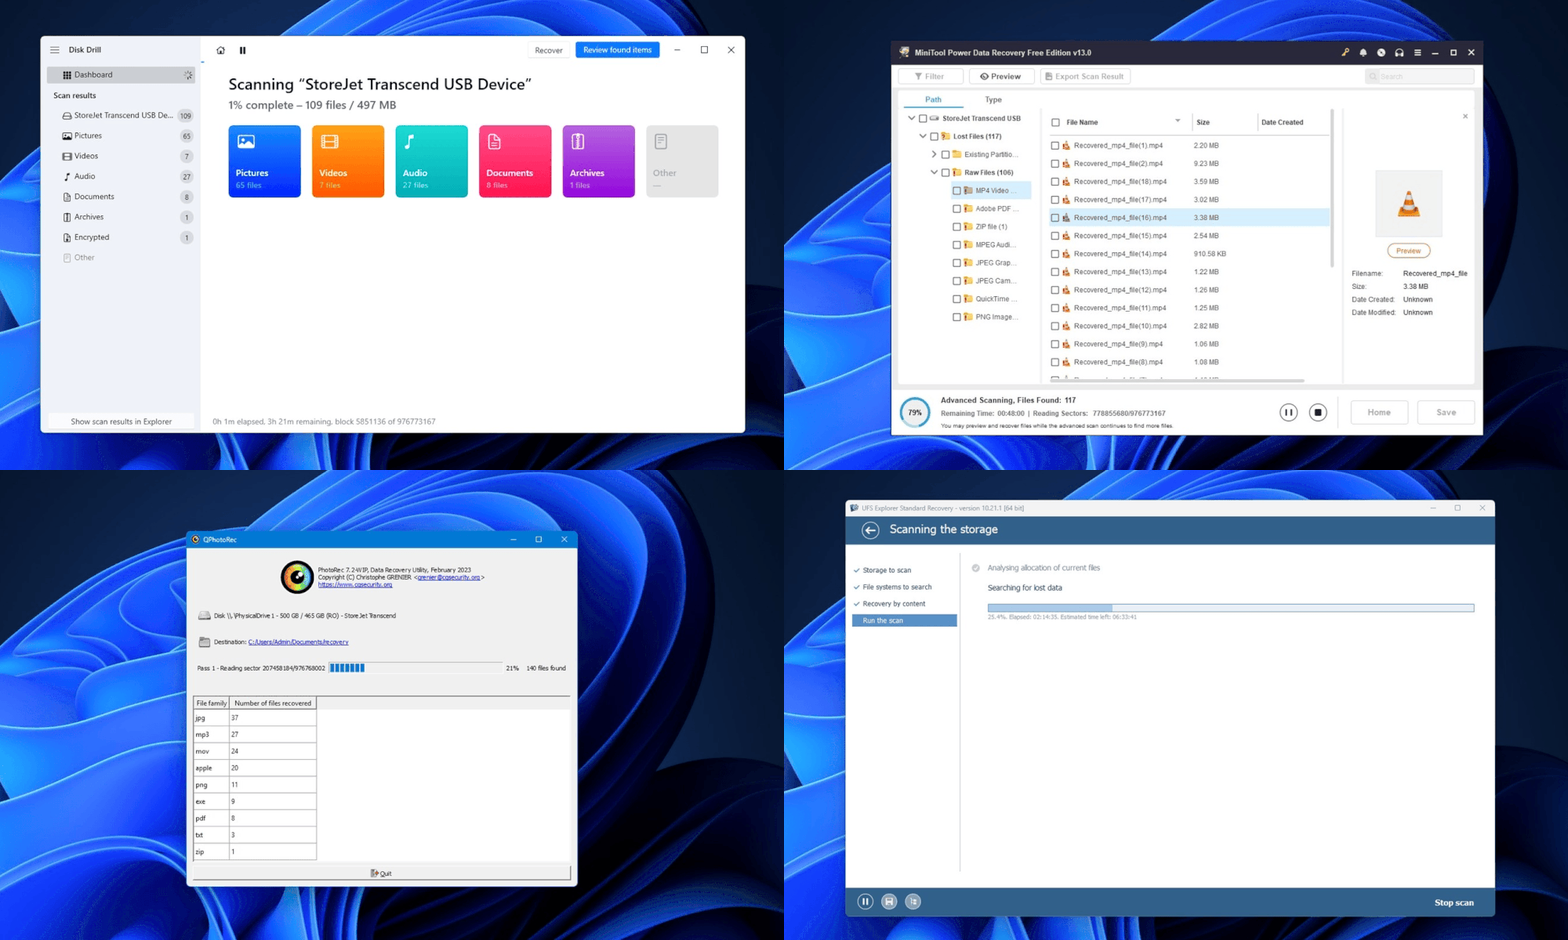
- Disk Drill finished at 99%,
- PhotoRec at about 97%,
- UFS Explorer at about 96%,
- MiniTool recovered about 80%.
What the Recovery Numbers Don’t Show
Now I also want to talk about the things that do not fit neatly into hard numbers. Whether you are new to data recovery or work with it every day, the experience around the scan matters (almost) as much as the final file count.
A tool can recover the same number of files as another one and still be much harder to use. That can come down to small things: how clearly it shows what was found, whether you can preview files before recovery, how easy it is to filter things, whether the UI makes sense without reading a manual, and how useful the free tier is.
Below, I gave each app a score out of 5 based purely on my own experience during this test. It is subjective, of course. Some things may matter more to one person and less to another, but the ratings should give you an idea of how each tool felt to use:
- Disk Drill gets 5/5. This was the easiest one to work with. The scan basically starts with one click, results are grouped clearly, and the preview pane was super useful. Filters, search, recovery chances, and previews made it easy to move through a result set without much work. The free Windows version lets you scan and preview everything and recover up to 100 MB. I also liked that features such as disk imaging and S.M.A.R.T. monitoring are not pushed into some separate higher tier. I hate when apps split useful features across multiple plans, so out of all four, this one felt the most complete and straightforward.
- UFS Explorer gets 3.5/5. This one is a less pleasing tool. There are more options, more technical information, and more control over what is happening. I can see why an experienced user would appreciate that, but it felt heavier than necessary. The interface takes longer to understand, especially if this is your first recovery. The free tier does not help much either. It only lets you recover files up to a few hundred kilobytes in size, which is almost useless for a real recovery job. Sure, that may cover some lightweight documents or text files, but plenty of PDFs, Office files, and other everyday files are already larger than that. Another thing I did not like was the lack of live results. Here, I had to wait for hours before I could properly see what the scan had turned up.
- MiniTool gets 3/5. It’s easy enough to get started with, and you can also recover files while the scan is still running, which is a big plus, in my opinion. But the overall experience feels fairly bare-bones. The preview feature was especially disappointing and failed on many of the files I tested, even though the same files previewed correctly in Disk Drill. Some settings are also harder to find than they should be. The free tier is more generous than, say, UFS Explorer at 1 GB of recovery, but overall MiniTool feels dated, so 3/5 seems fair.
- PhotoRec gets 2.5/5 for usability, much better for value. It is the odd one out here because it is completely free and open source, so I did not expect the same level of polish as the commercial tools. Even using QPhotoRec (the GUI version I tested) the experience is still pretty bare-bones. There are no previews, no result browser, none of the little conveniences I got used to with the other apps. You choose what to scan, set the destination, and let it run. That simplicity is fine if you already know what you are doing, and for a free tool it is hard to complain too much. But in terms of usability alone, I cannot give it more than 2.5.
My Final Take on Formatted Hard Drive Recovery
After this latest mini test, which ended up taking me two days to run, here is what I would say to anyone who accidentally formatted a hard drive: first, do not use it until you are ready to scan it.
Second, choose the recovery tool carefully. My test showed that the results can vary quite a bit, and there is a meaningful difference between (1) a file being found, (2) being recovered, (3) actually opening in working condition afterward.
I started this test mostly because I wanted to tinker with the latest versions of recovery apps and see how they handled the same case. After going through all of them, Disk Drill is still one of the easiest and surest ways to recover data from formatted drives. The scan takes very little setup, the results are easy to understand, previews help a lot, and the whole process is hard to mess up. And the numbers from my test clearly put it ahead of the other tools I tried, so the convenience does not seem to come at the expense of recovery performance.
But maybe at the risk of repeating myself, recovery software is only part of the equation. What you do after the format matters too. If you keep using the drive, copy new files to it, or recover data back onto the same disk, even a good tool may have much less to work with.
So the best results come from a good recovery app + a drive that has been left alone since the format.