
I deleted the photos myself. That was the worst part. I was going through pictures on my camera during a trip around Europe, doing the usual cleanup. Somewhere in that quick review, I removed a couple of photos I actually wanted to keep. They were not once-in-a-lifetime masterpieces, I grant you that, but they were from a trip I would rather not forget, and I had not copied the SD card to my laptop yet.
At first, I was not planning to “test” anything. But once I started searching for how to recover deleted files from an SD card, I ran into advice that sounded outdated; some did not apply to my case at all, and some tips looked risky.
So I slowed down and began taking notes on what I tried. I used to keep a Medium blog years ago, and I guess the habit never fully left me: I took screenshots and wrote down everything. Partly because I did not want to make the same mistake twice, and partly because I wished someone had explained this from a normal user’s POV.
In the end, the whole thing took me entire evening. I tried several recovery apps, compared what each app found, and wrote it down. Think of this as my field note from that mistake, later cleaned up with input from people who deal with data recovery far more often than I do. Hopefully, it saves you from guessing your way through the same situation.

Key Takeaways From My Deleted SD Card Recovery Case
Here is the TL;DR version of what I learned while trying to recover deleted files from my SD card, in case you do not feel like reading the whole story:
- Put the SD card away until you know what to do next. Seriously. Remove it from the camera, drone (or whatever device it was in). Stop using it. No new photos, no test videos. You will thank me later.
- The most useful way to recover deleted files from an SD card is a data recovery app. You will find plenty of online advice about Recycle Bin, File History, Time Machine, maybe CHKDSK, attrib and other “methods.” Most of that was borderline useless.
- Not all SD card recovery software is equally capable. If we are talking about simple deleted files, most decent recovery apps have a fair chance. But that does not mean every app is equally good once the case gets messier. RAW photos, videos, formatted cards, corrupted file systems, or cards that suddenly ask to be formatted can expose the weak spots fast. That is a separate rabbit hole, and I will not pretend my deleted-file case covers all of it, but it is worth keeping in mind.
- Do not get stuck on the SD card brand. SanDisk, Samsung, Kingston, Lexar, Transcend, cheap no-name card – the recovery path is the same. Official brand recovery apps may be worth checking if you already have a license (sometimes it comes as a bonus with the purchased card) but I would not treat them as the best option.
- Use a card reader instead of connecting the camera by cable. That is what worked for me. The recovery app could scan the SD card directly.
- Preview is your best friend, but do not treat it like a perfect judge. When I saw a deleted photo open in preview, I knew I had a chance. But a file that does not preview is not always dead (especially if it is a RAW photo or some “exotic” format). Also, not every recovery app has a preview feature.
- Do not recover files back to the same SD card. Save them to your laptop or anywhere else with enough space. Writing recovered files back to the same card can overwrite other deleted files you still might be able to recover later.
- Your chances mostly depend on what you did after deletion. If you stopped using the card right away, you are in a much better place. If you kept shooting photos or recorded a long video after the mistake, some files may already be overwritten. But you can never know for sure what survived until you scan the card, so I still think it makes sense to run a recovery scan anyway.

Why I Stopped Using the SD Card Right Away
The first thing I did after realizing I deleted the wrong photos was take the SD card out of the camera.
I wish I could say this was some smart instinct, but no. I was still on the trip, standing there with the camera in my hands, and I did not have time to properly figure it out. So I did the quickest thing possible: I asked ChatGPT from my phone what to do if I had deleted photos from a camera SD card.
The first advice was: stop using the card and do not write anything new to it. So I took the SD card out, put it aside, and switched to another card for the rest of the day. I decided I would deal with recovery later, when I had my laptop and enough time. (Looking back, that helped more than anything else.)
Once I had time to actually dig into it, I found a Reddit thread on r/AskEngineers where people explained what happens when you delete data from a memory card. The simple version is this: when you delete a photo from an SD card, the card does not wipe the actual photo. It removes the reference to that file and marks the space as “available”. One commenter compared it to removing a listing from a table of contents. The pages still there, but the device no longer points to them.
It also explained why everyone kept saying the same thing: stop using the card – the deleted photo may still be there, but now it is living in space the camera is allowed to reuse. So the next photo or video clip I take may land on top of it. (Or it may not. You can’t know for sure.) But once that happens, SD recovery software has much less to work with.
What I Tried to Recover Data From the SD Card
So I already spoiled the main point: the most useful way to undelete files from an SD card is to use data recovery software. But I did not accept that right away. When AI first told me recovery software was the most realistic path, I brushed it off. AI is not correct 100% of the time, as you know. So I went looking for alternatives. Most of what I found was either completely inapplicable in my case or useful for a totally different SD card problem. “Use a backup” was technically correct, sure, but if I had a backup, I would not have been searching in the first place.
I also kept running into utilities that kind of relate to SD card issues, but not to deleted data specifically. CHKDSK, First Aid, and similar fixes may help when the card is corrupted (as I learned). But my card was fine. It still opened. I had a deleted-file problem, not a broken-card problem.
So in my case, the first answer I got turned out to be the right one. And I ended up testing several SD card recovery apps.
Below is what happened with each app I tried, and which one I would personally recommend to someone who had to recover deleted files from an SD card.
If you are in the same situation, simply use Disk Drill. I tried 3 recovery apps overall:
- PhotoRec was free and recommended in several places, but it was too technical for me on the first try, so I gave up before recovering anything.
- Recuva was much easier and did recover 2 photos I was looking for, but it missed the rest, and a second scan gave me the same result.
- Disk Drill ended up being the best way to recover deleted files from my SD card: it was simple to use, showed results while scanning, let me preview the photos, and found all the deleted files.
PhotoRec
The first app I tried was PhotoRec.
I saw it recommended in a Reddit thread about recovering lost photos from an SD card. People described it as a free undelete tool for SD cards, and I pretty much stopped reading after the word “free”. That is usually enough to make me download something and figure out the details later.
This time, that did not work great. PhotoRec comes together with TestDisk, so at first I was not even fully sure which app I was using. Then I launched PhotoRec and was greeted by a Terminal window. (There is also a version with a more normal-looking interface, but I missed that on my first try.) So there I was staring at a black console window.
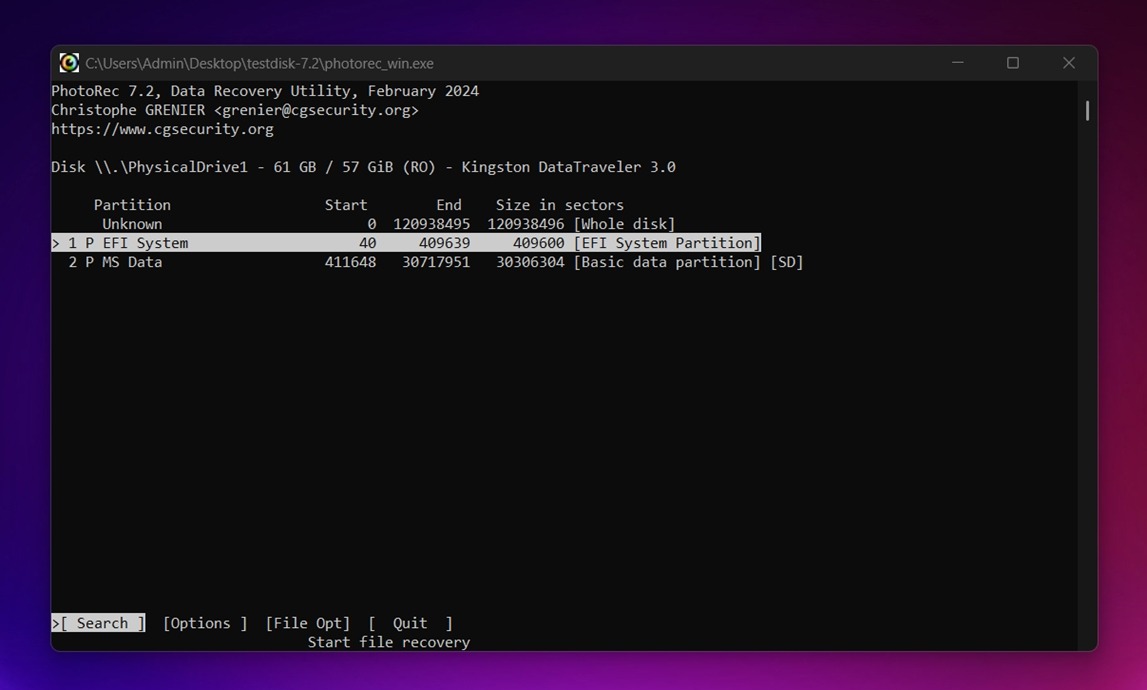
To be fair, I did manage to download it, launch it, and get through the first few screens. But once I had to choose the partition or the file system type, my patience started running out. Maybe that says more about me than about PhotoRec, but this was not my idea of an easy recovery process.
I do not want to guess whether I selected the right partition or whether the app is about to scan the correct device.
I am sure PhotoRec can be useful in the right hands, and I understand why people recommend it. But for my case, on that first attempt, I gave up before I got anything useful. Call me stupid if you want, but I wanted an app that made the next step obvious.
Recuva
PhotoRec was a no-go for me, so I googled for PhotoRec alternatives that were still free but a bit more on my level, and I found a list of the best free recovery apps where Recuva was described as “about as simple as it gets”. That sounded like my lane, so I downloaded it next.
Recuva was much easier to use than PhotoRec. It has a normal Windows interface – a wizard that walks you through the scan, and it does not make you feel like you are one wrong keyboard press away from doing something wrong.
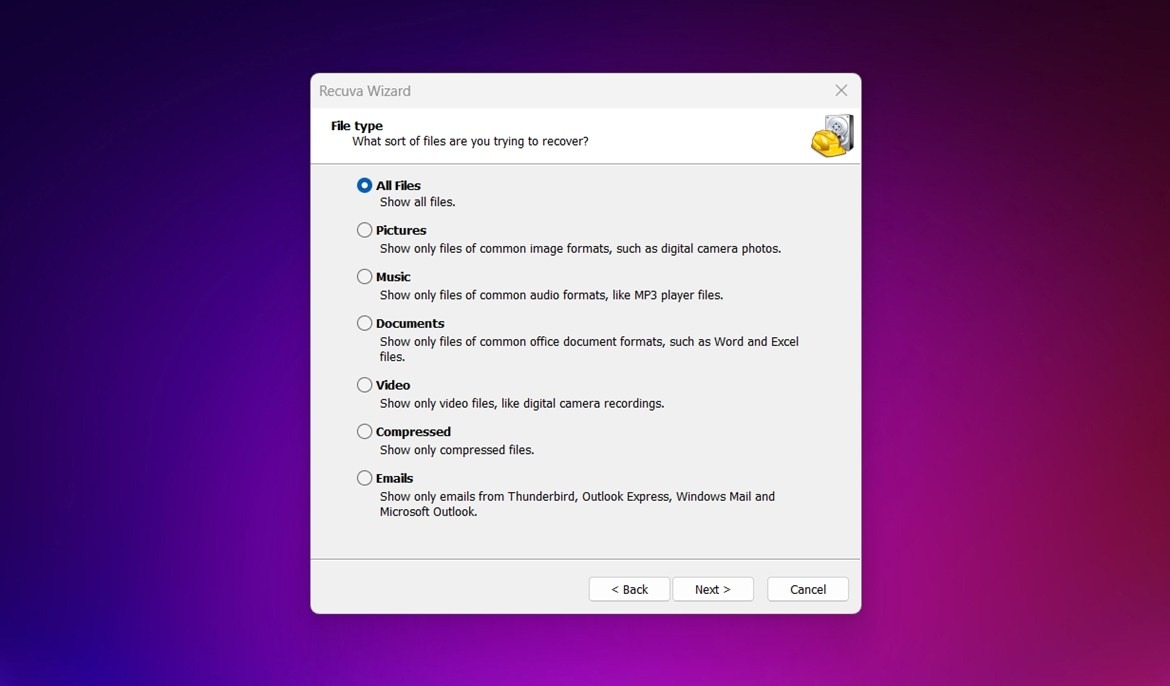
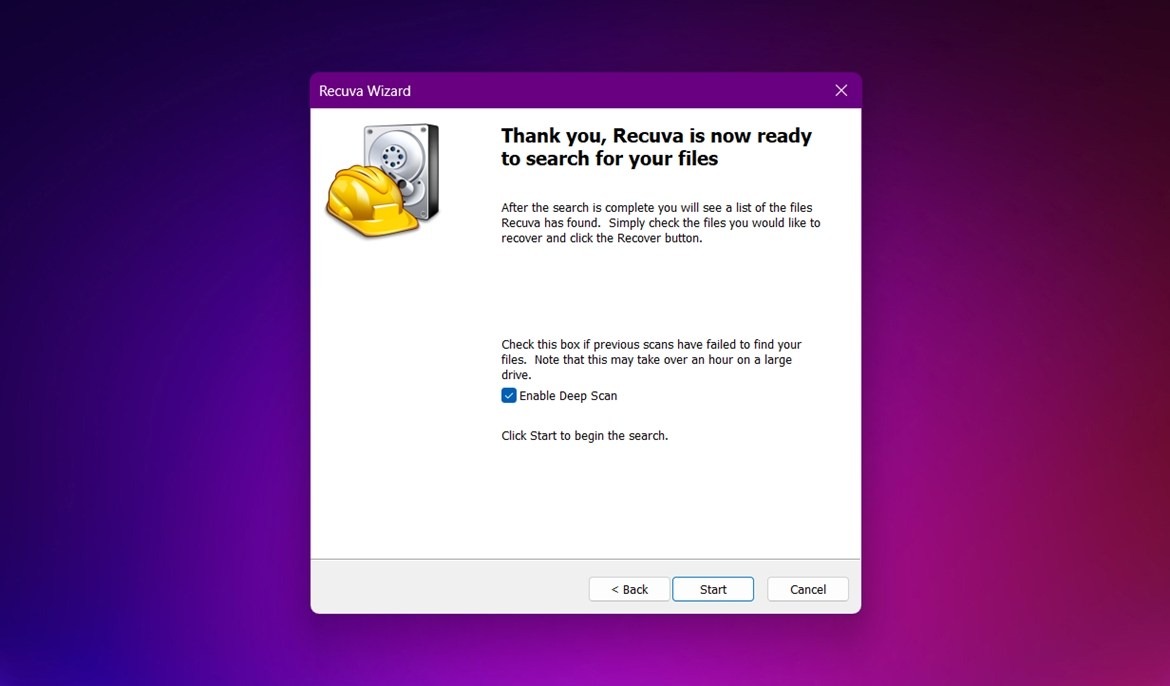
I selected pictures, pointed it to the SD card, and let it scan. (at the final menu it also showed a Deep Scan checkbox. I turned it on because, well, the name made it sound like the stronger option, and at that point I wanted the app to look as deep as it could. )
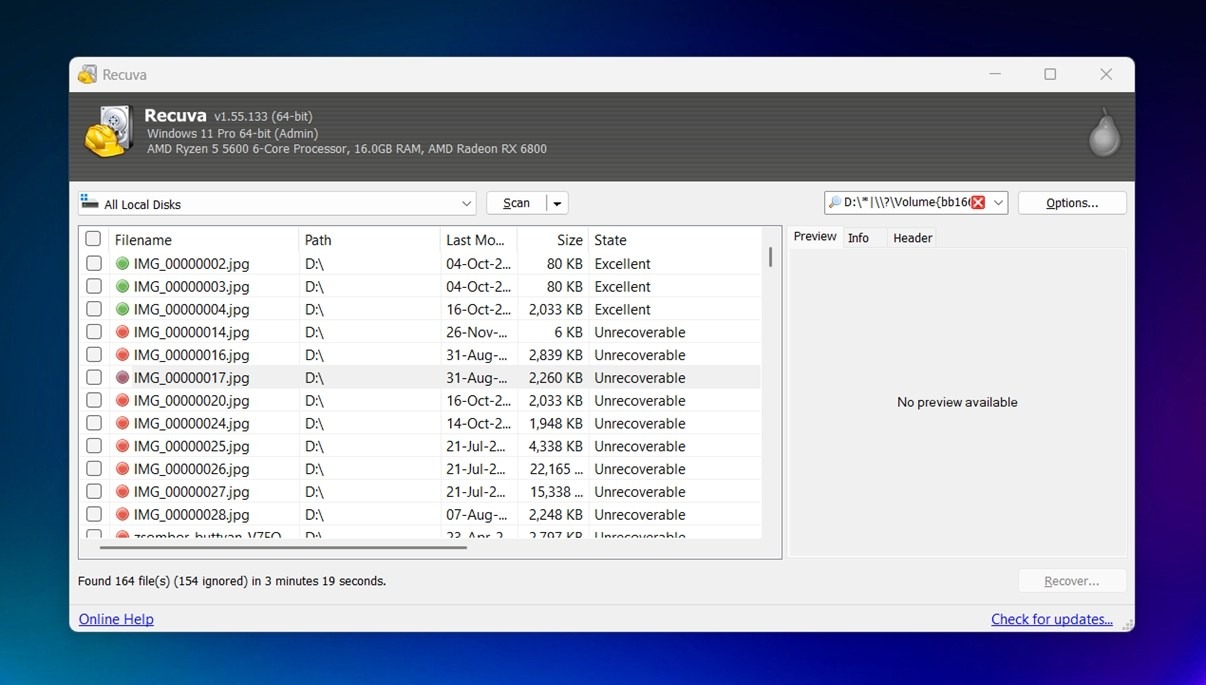
Recuva did find files, so I cannot say it failed. The scan showed around 160 files found, and some even had a green dot and an Excellent state, which looked promising.
But it found only 2 photos I was specifically looking for. That was something. I was happy to see them, but I also knew there were at least 4-5 more photos I would hate to lose. Most of the other files in Recuva were marked Unrecoverable (with red dots next to them), and the preview panel kept showing No preview available. Not exactly what I was hoping for.
I tried running the scan again, mostly because I did not want to accept the first result.
The result did not change in any way.
So that was my next small lesson: rescanning the same card with the same app does not produce a better recovery result. Maybe it can help if you picked the wrong scan options the first time, but in my case, the second full scan gave me the same answer. Recuva recovered something, but not enough for me to stop there.
Disk Drill
The next app I tried was Disk Drill.
I had seen it in the same “best recovery apps” lists as Recuva, but it was described as a freemium tool. The app was free to download and free to scan with, so I decided to try it. My thinking was simple: if Disk Drill also found nothing new, I would take a break. At that point, I was getting a bit tired of my little data recovery experiment.
I pushed one more time.
First impression: Disk Drill looked much better than the previous two apps. No doubt about it. The main screen was simple enough that I did not have to think too hard. I selected my SD card, pressed the blue Search for lost data button, and the app asked what type of scan I wanted to run. Universal Scan sounded like the safest I do not know what I am doing, please handle it option, so I went with that.
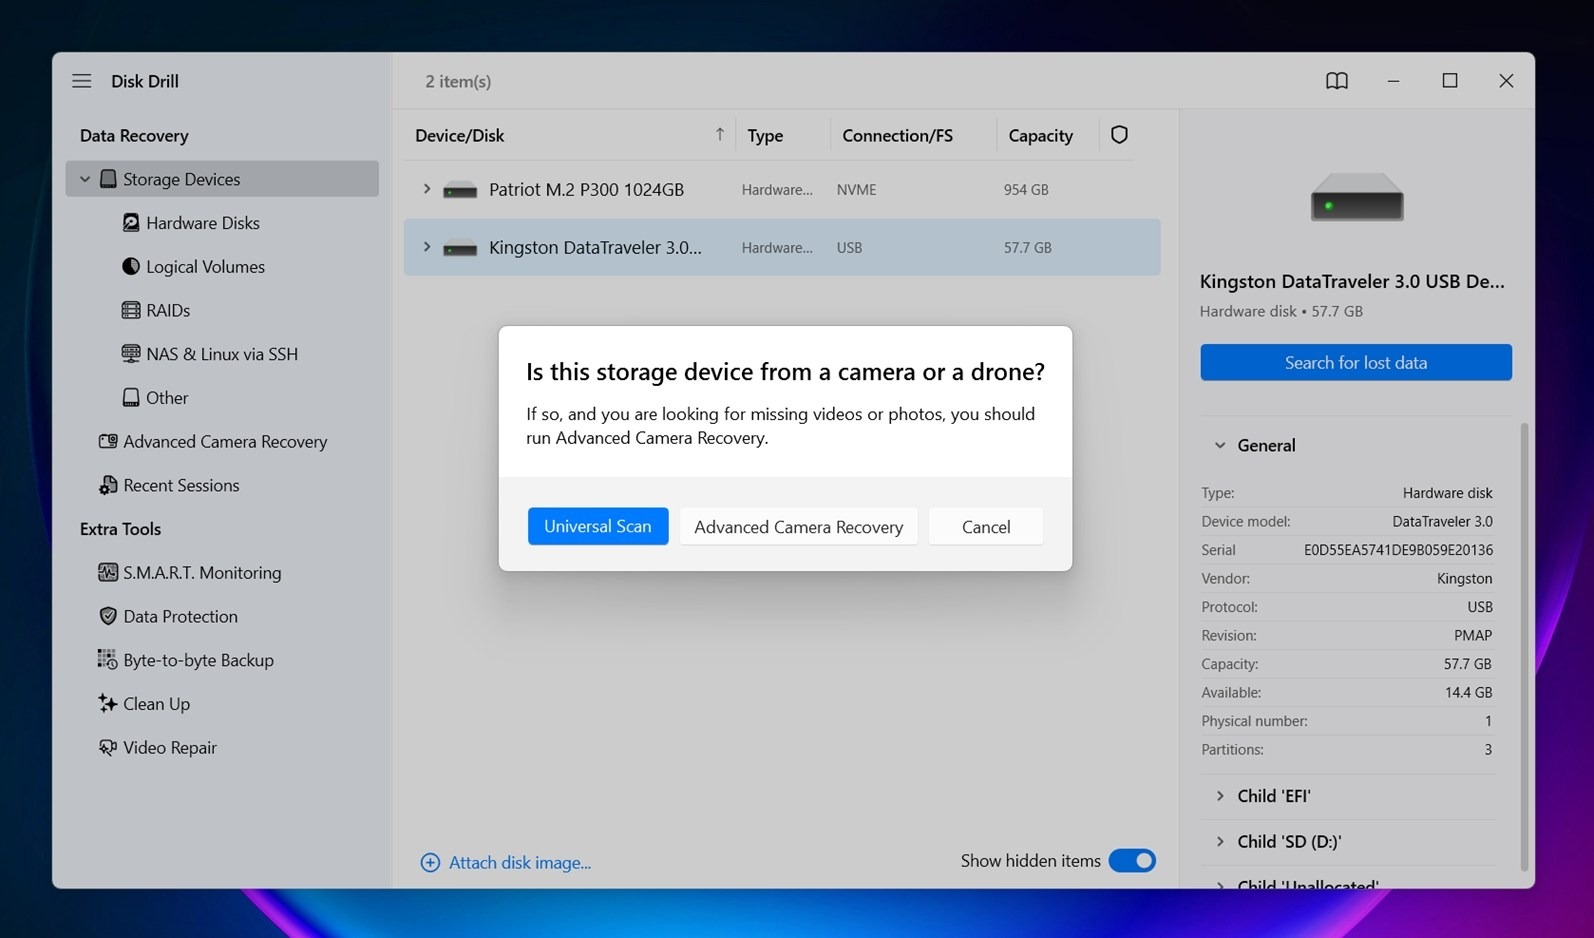
Then the scan started.
One thing I liked right away was that Disk Drill began showing results while it was still scanning. After running scans on the same card several times already, that felt like a nice touch. I did not have to sit there staring at a progress bar, wondering if I was wasting another 15 minutes. I could already click around, check found files, and see whether anything useful was appearing.
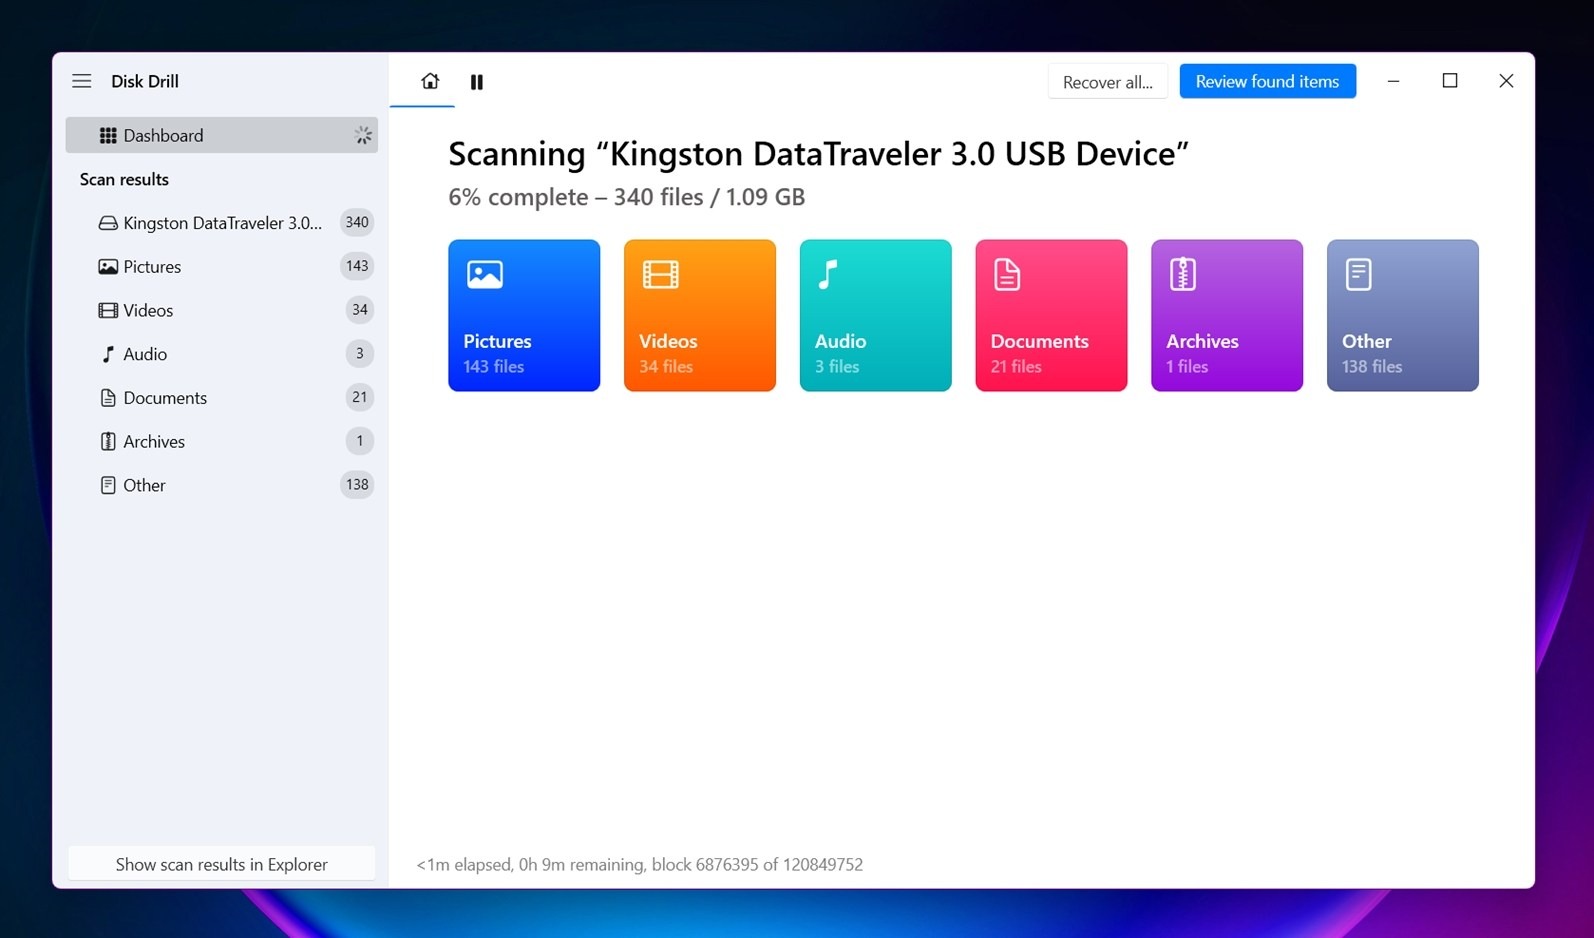
I will not keep you in suspense: Disk Drill found the same 2 photos Recuva found. But. It also found the 5 more photos I was still looking for.
The relief I felt when I saw them in preview is hard to overstate. I was clicking through the found photos, half-expecting more disappointment, and then there they were. The deleted files I thought I might have lost were visible in the preview panel.
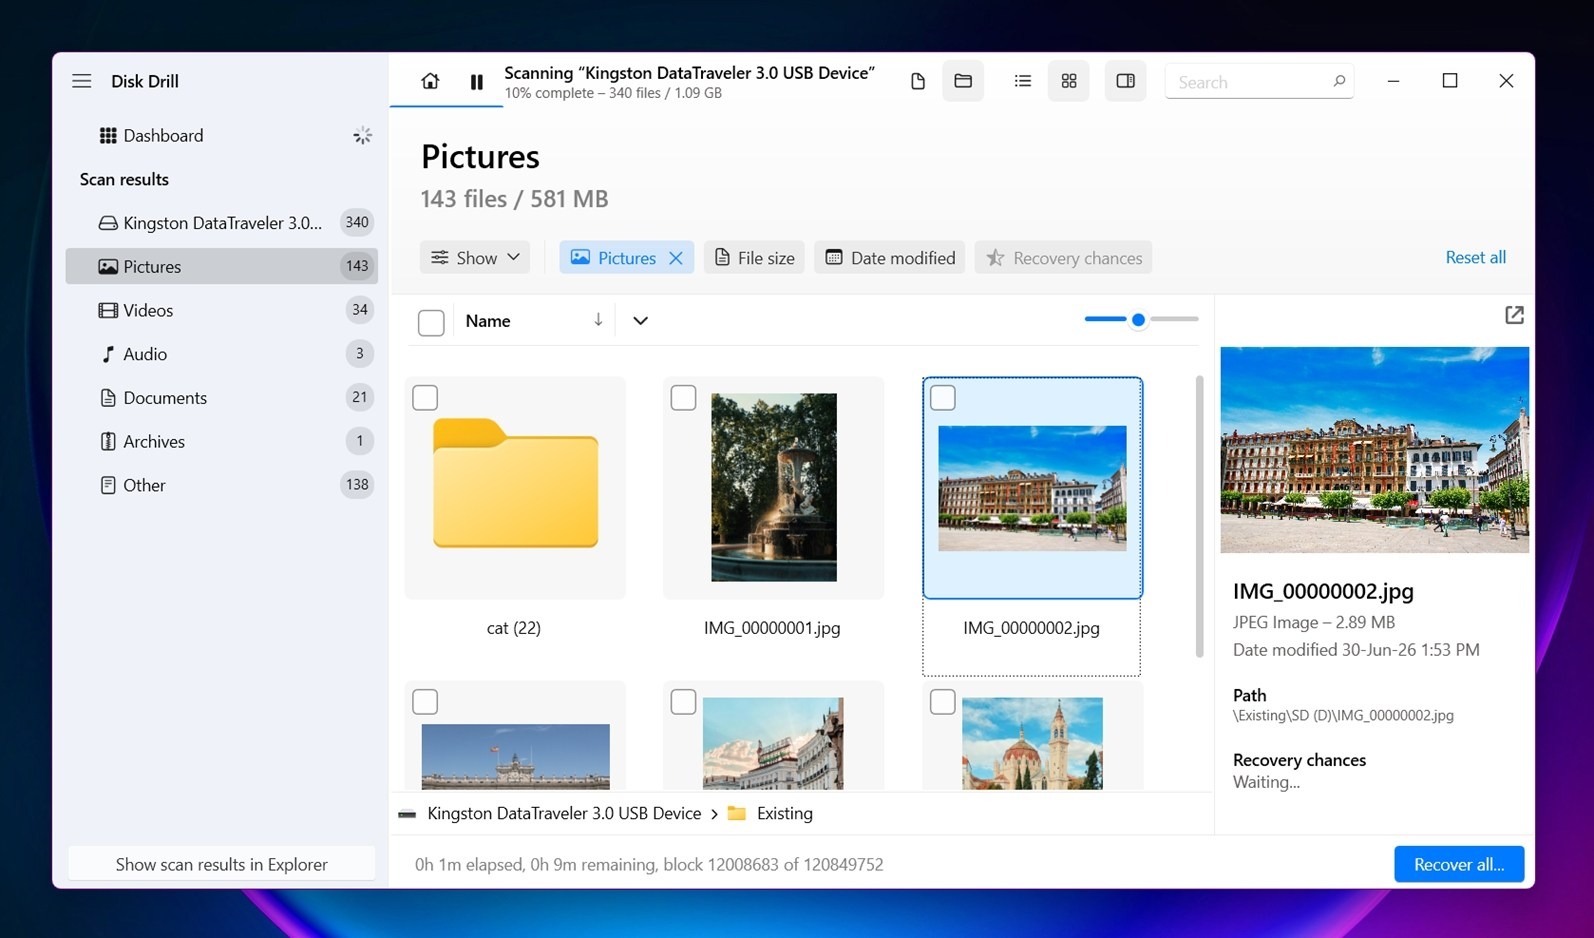
Another pleasant surprise was that I could recover the photos I needed without the app asking me to pay. On Windows, Disk Drill includes some free recovery capacity, probably for demo purposes, but in my case it was enough for couple photos. So, basically, I was able to recover files from my SD card for free.
After PhotoRec confused me and Recuva only got me part of the way there, Disk Drill was the first app that gave me the full result I wanted.
What Worked and What Did Not
Let’s summarize my little SD card recovery adventure and how it went.
| Tool | UI / first impression | Photos I could recover | Was it free in my case? | Speed | Ease of use | Would I recommend it for this situation? |
|---|---|---|---|---|---|---|
| PhotoRec | Terminal-style interface on my first try. I later learned there is a more normal-looking version, but I missed it at the time | 0 (I gave up before recovery) | Yes, it is free | Hard to judge | Hard, at least for me | Not as my first pick for a normal user who deleted camera photos and wants the simplest path |
| Recuva | Normal Windows app with a wizard. Much less scary than PhotoRec | 2 photos I was specifically looking for | Yes | Fast (under 5 min) | Easy | Maybe as a quick first try |
| Disk Drill | Modern interface, clear device list, big blue Search for lost data button. Easiest to understand right away | All photos I wanted | Yes, the free Windows recovery limit was enough for my files | Fast (under 5 min), and the live results made the wait feel shorter | Very easy | Yes. This is the one I would personally suggest to someone in the same situation |
So my personal verdict is simple: if I had to recover deleted files from an SD card again, I would start with Disk Drill, keep Recuva as a quick free fallback, and leave PhotoRec for someone more comfortable with technical tools.
Methods I Would Not Try
I already mentioned this above, but I think it deserves its own quick section – “methods” that I would skip entirely.
If you do not believe me, fair enough. I also did not believe the first answer I got.
So let’s quickly go through the usual suggestions and why they do not make sense in this case:
| Method | Why people recommend it | Why I would not start there for deleted SD card files |
|---|---|---|
| Recycle Bin / Trash | Deleted files sometimes go there when you remove them from a computer. | I deleted the photos directly in my camera. They never touched my computer, so there was nothing to find in Recycle Bin or Trash. |
| File History / Time Machine | These can restore files from backups. | Great if you had a backup on your computer. I did not. Telling someone to use a backup when they do not have one is technically correct (and practically useless). |
| CHKDSK / First Aid | These tools can repair file system problems. | My SD card was not broken or unreadable. It still opened fine. I had deleted photos, not a damaged file system. Pass. |
| Formatting the SD card | Formatting can make an unreadable card usable again. | Same as above – my SD card was not unreadable. Also, formatting before recovery sounded like a terrible idea to me. Maybe it can help in other SD card cases, but I wanted the photos back first. |
| Camera menu options | Some cameras have basic file management or protection features. | My camera did not have a “undo delete” button. Once the photos were gone from the camera playback screen, that path was closed. |
The short version: a lot of these tips are not “wrong”. They are just for different situations.
If you deleted files from the SD card while it was connected to a computer, Recycle Bin / Trash maybe it might be worth checking. If your SD card is corrupted, repair tools may enter the conversation later. If you had a backup, then yes, use the backup and enjoy being more responsible than I was.
But for my case – deleted camera photos, readable SD card, no backup – these methods were dead ends. The only thing that actually helped me retrieve files from SD card was scanning it with recovery software.
My Final Advice If You Are in the Same Situation
By this point, you probably already know where I landed.
If you need to recover deleted files from a memory card, I would go straight to recovery software. There are tons of app names you will run into while searching, and I tried a few of them myself. Some take too much time to figure out. Or are easy but do not recover as much as you hope. In my case, Disk Drill ended up being the best way to retrieve lost photos from an SD card. It found all the photos other apps missed, and was super easy to use. It would be my first recommendation for this kind of case.

Do not touch the SD card until you are ready to recover from it. Download a capable recovery app, connect the card through a card reader, scan it, preview what it finds, and recover the files to your computer or another drive.
That is the closest thing I found to a quick recipe for success.
I decided to write this down because I lost way more time than I expected on what looked like a small mistake. The actual recovery took one evening (around 4 hours). The whole process – searching threads, reading guides, trying different tools, scans, and all that – took me a while. Some of that time went into figuring out which advice applied to my case and which advice was meant for a completely different SD card problem.
That was my motivation for sharing it. I am not pretending this is a full lab test or a universal answer for every issue. This was one deleted-photo case from a camera SD card, written from the POV of someone who had to solve it without any tech background. If it saves you from running in circles, then it was at least useful for something.